⚠ 주의 : 본 포스트에서는 k8s에 VPN으로 우회되는 Torrent 서버 구성에 대한 정보를 담고 있습니다.
부적절한 컨텐츠는 VPN이고 뭐고 절대 받지 맙시다! 👮
문제의 시작
- Jellyfin으로 지인들과 편하게 미디어를 함께 보고 싶어졌다.
귀칼이 그렇게 재밌다길래 - 미디어 콘텐츠를 구하는 가장 좋은 방법은 Torrent이다.
- 하지만 이를 위해 메인 PC를 하루종일 켜두고 싶지는 않다.
- 보안을 위해 VPN은 쓰되, 메인 PC 전체 트래픽을 VPN에 묶고 싶지는 않다.
해결방안
k8s 클러스터에 qBittorrent 배포
VPN 구성을 위해 NordVPN의 서비스인 NordLynx를 적용
Ingress를 구성해서 보유한 도메인을 통해 접근 가능하도록 설정 (선택)
qBittorrent의 기본 UI는 너무 못생겼으므로 UI도 VueTorrent로 변경 (선택)
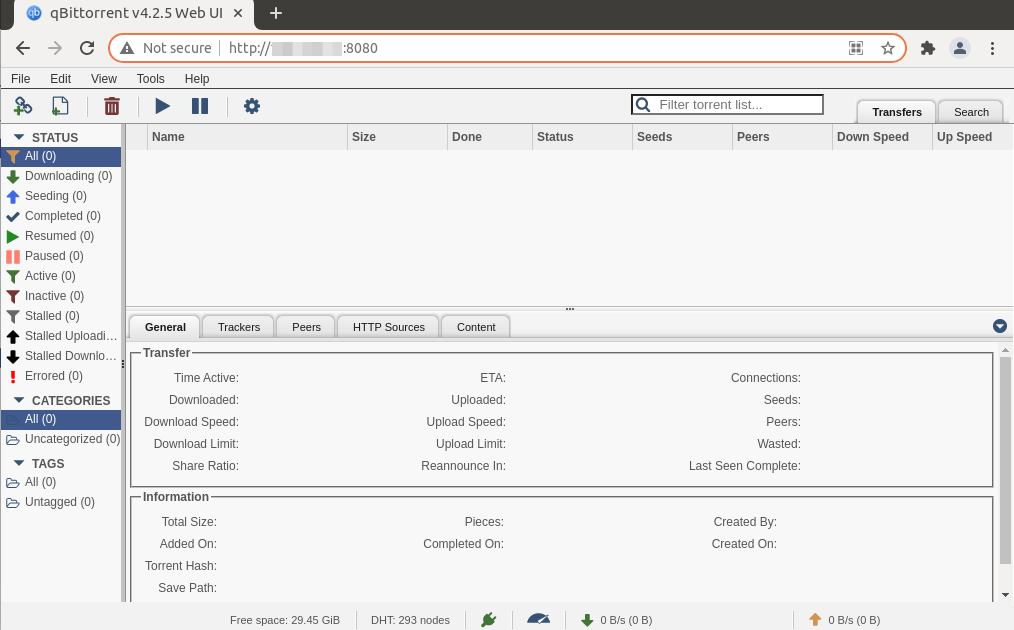 참고로 기본 UI는 이렇게 생겼다.
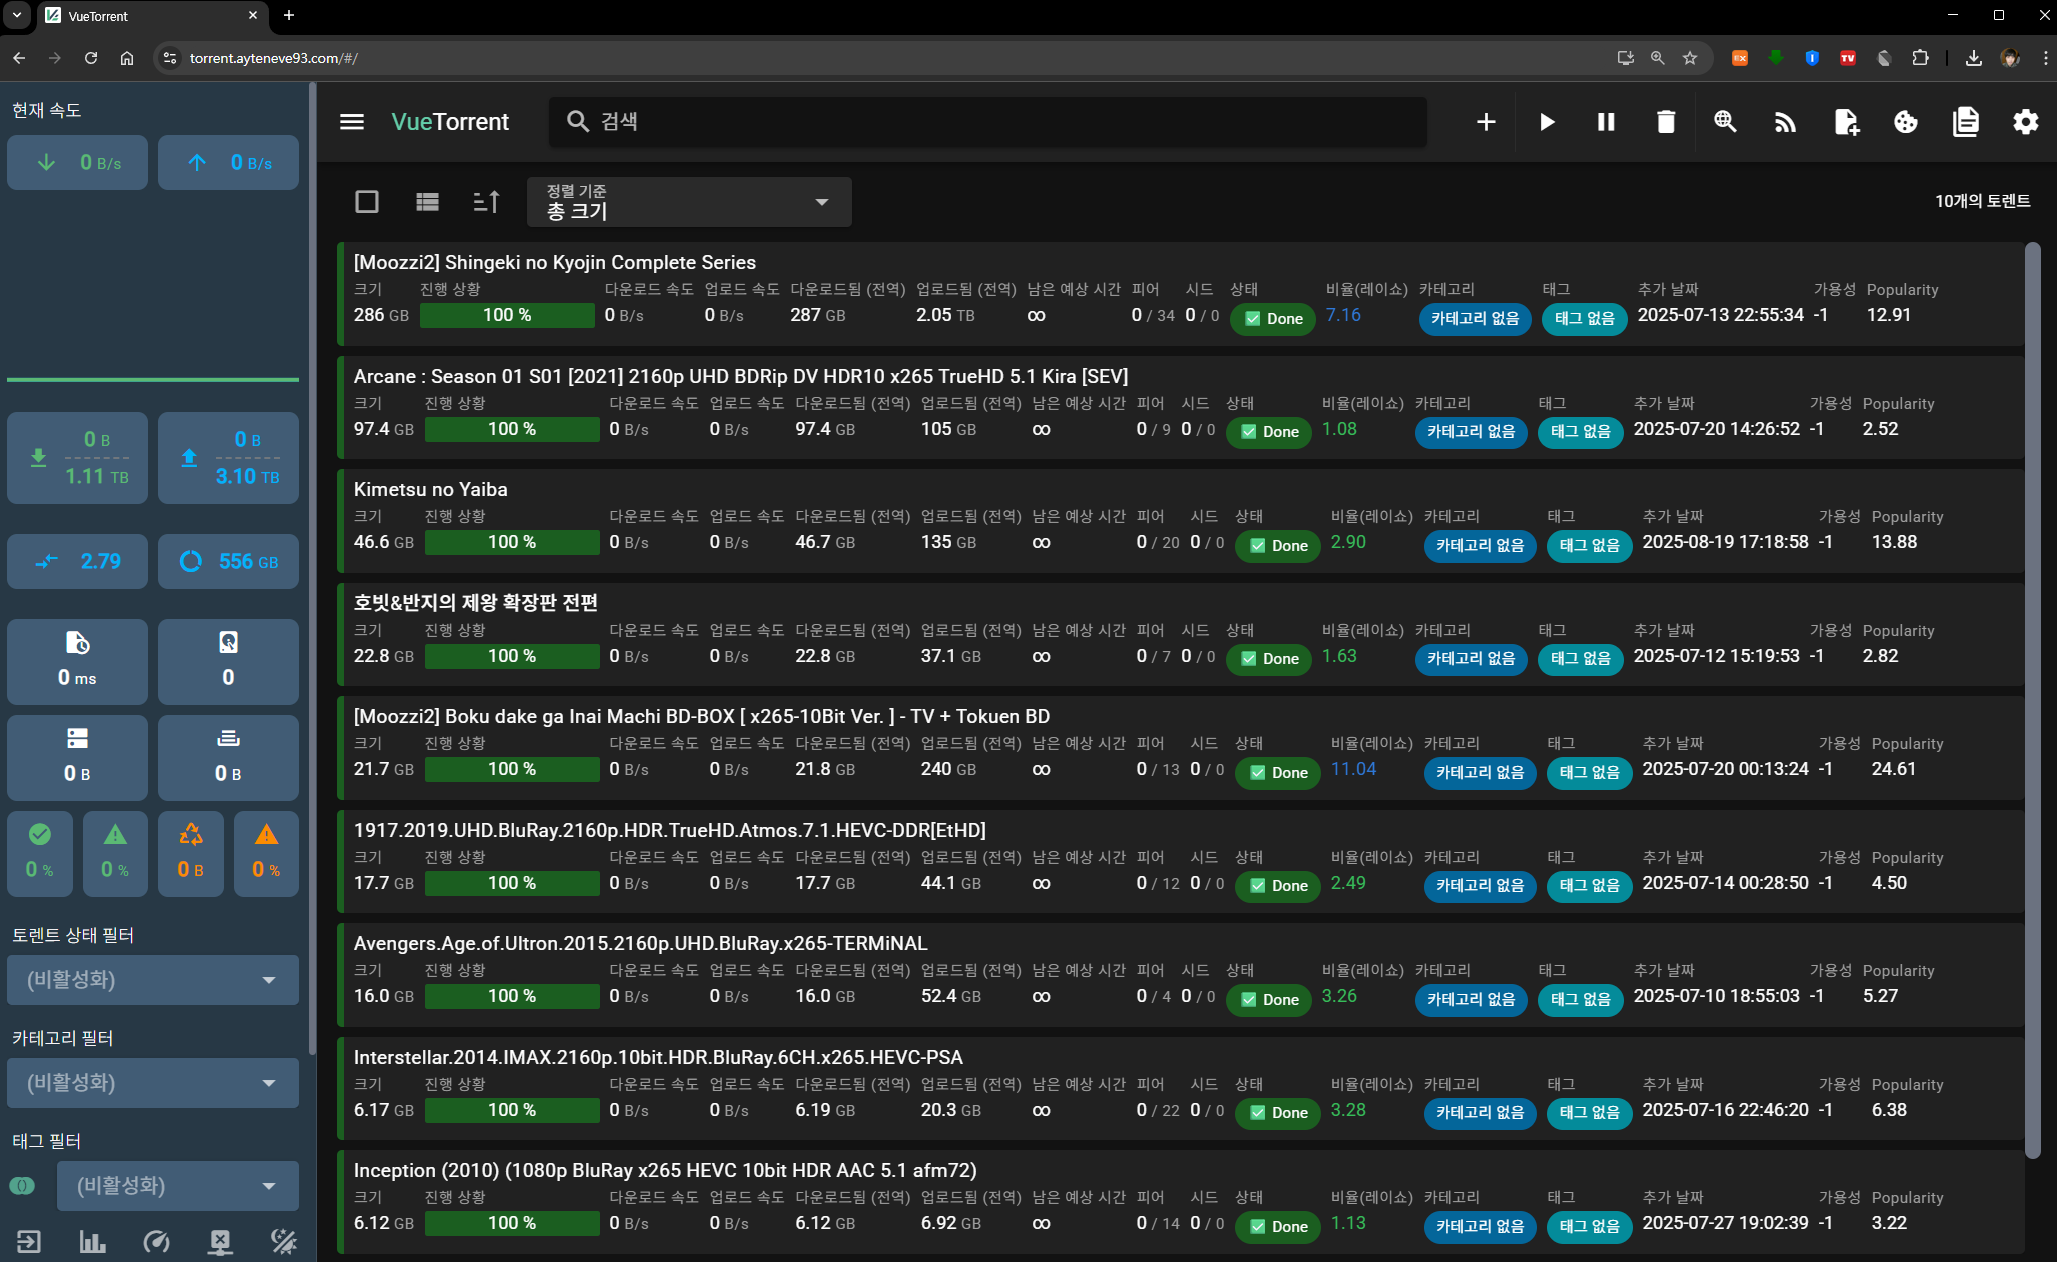
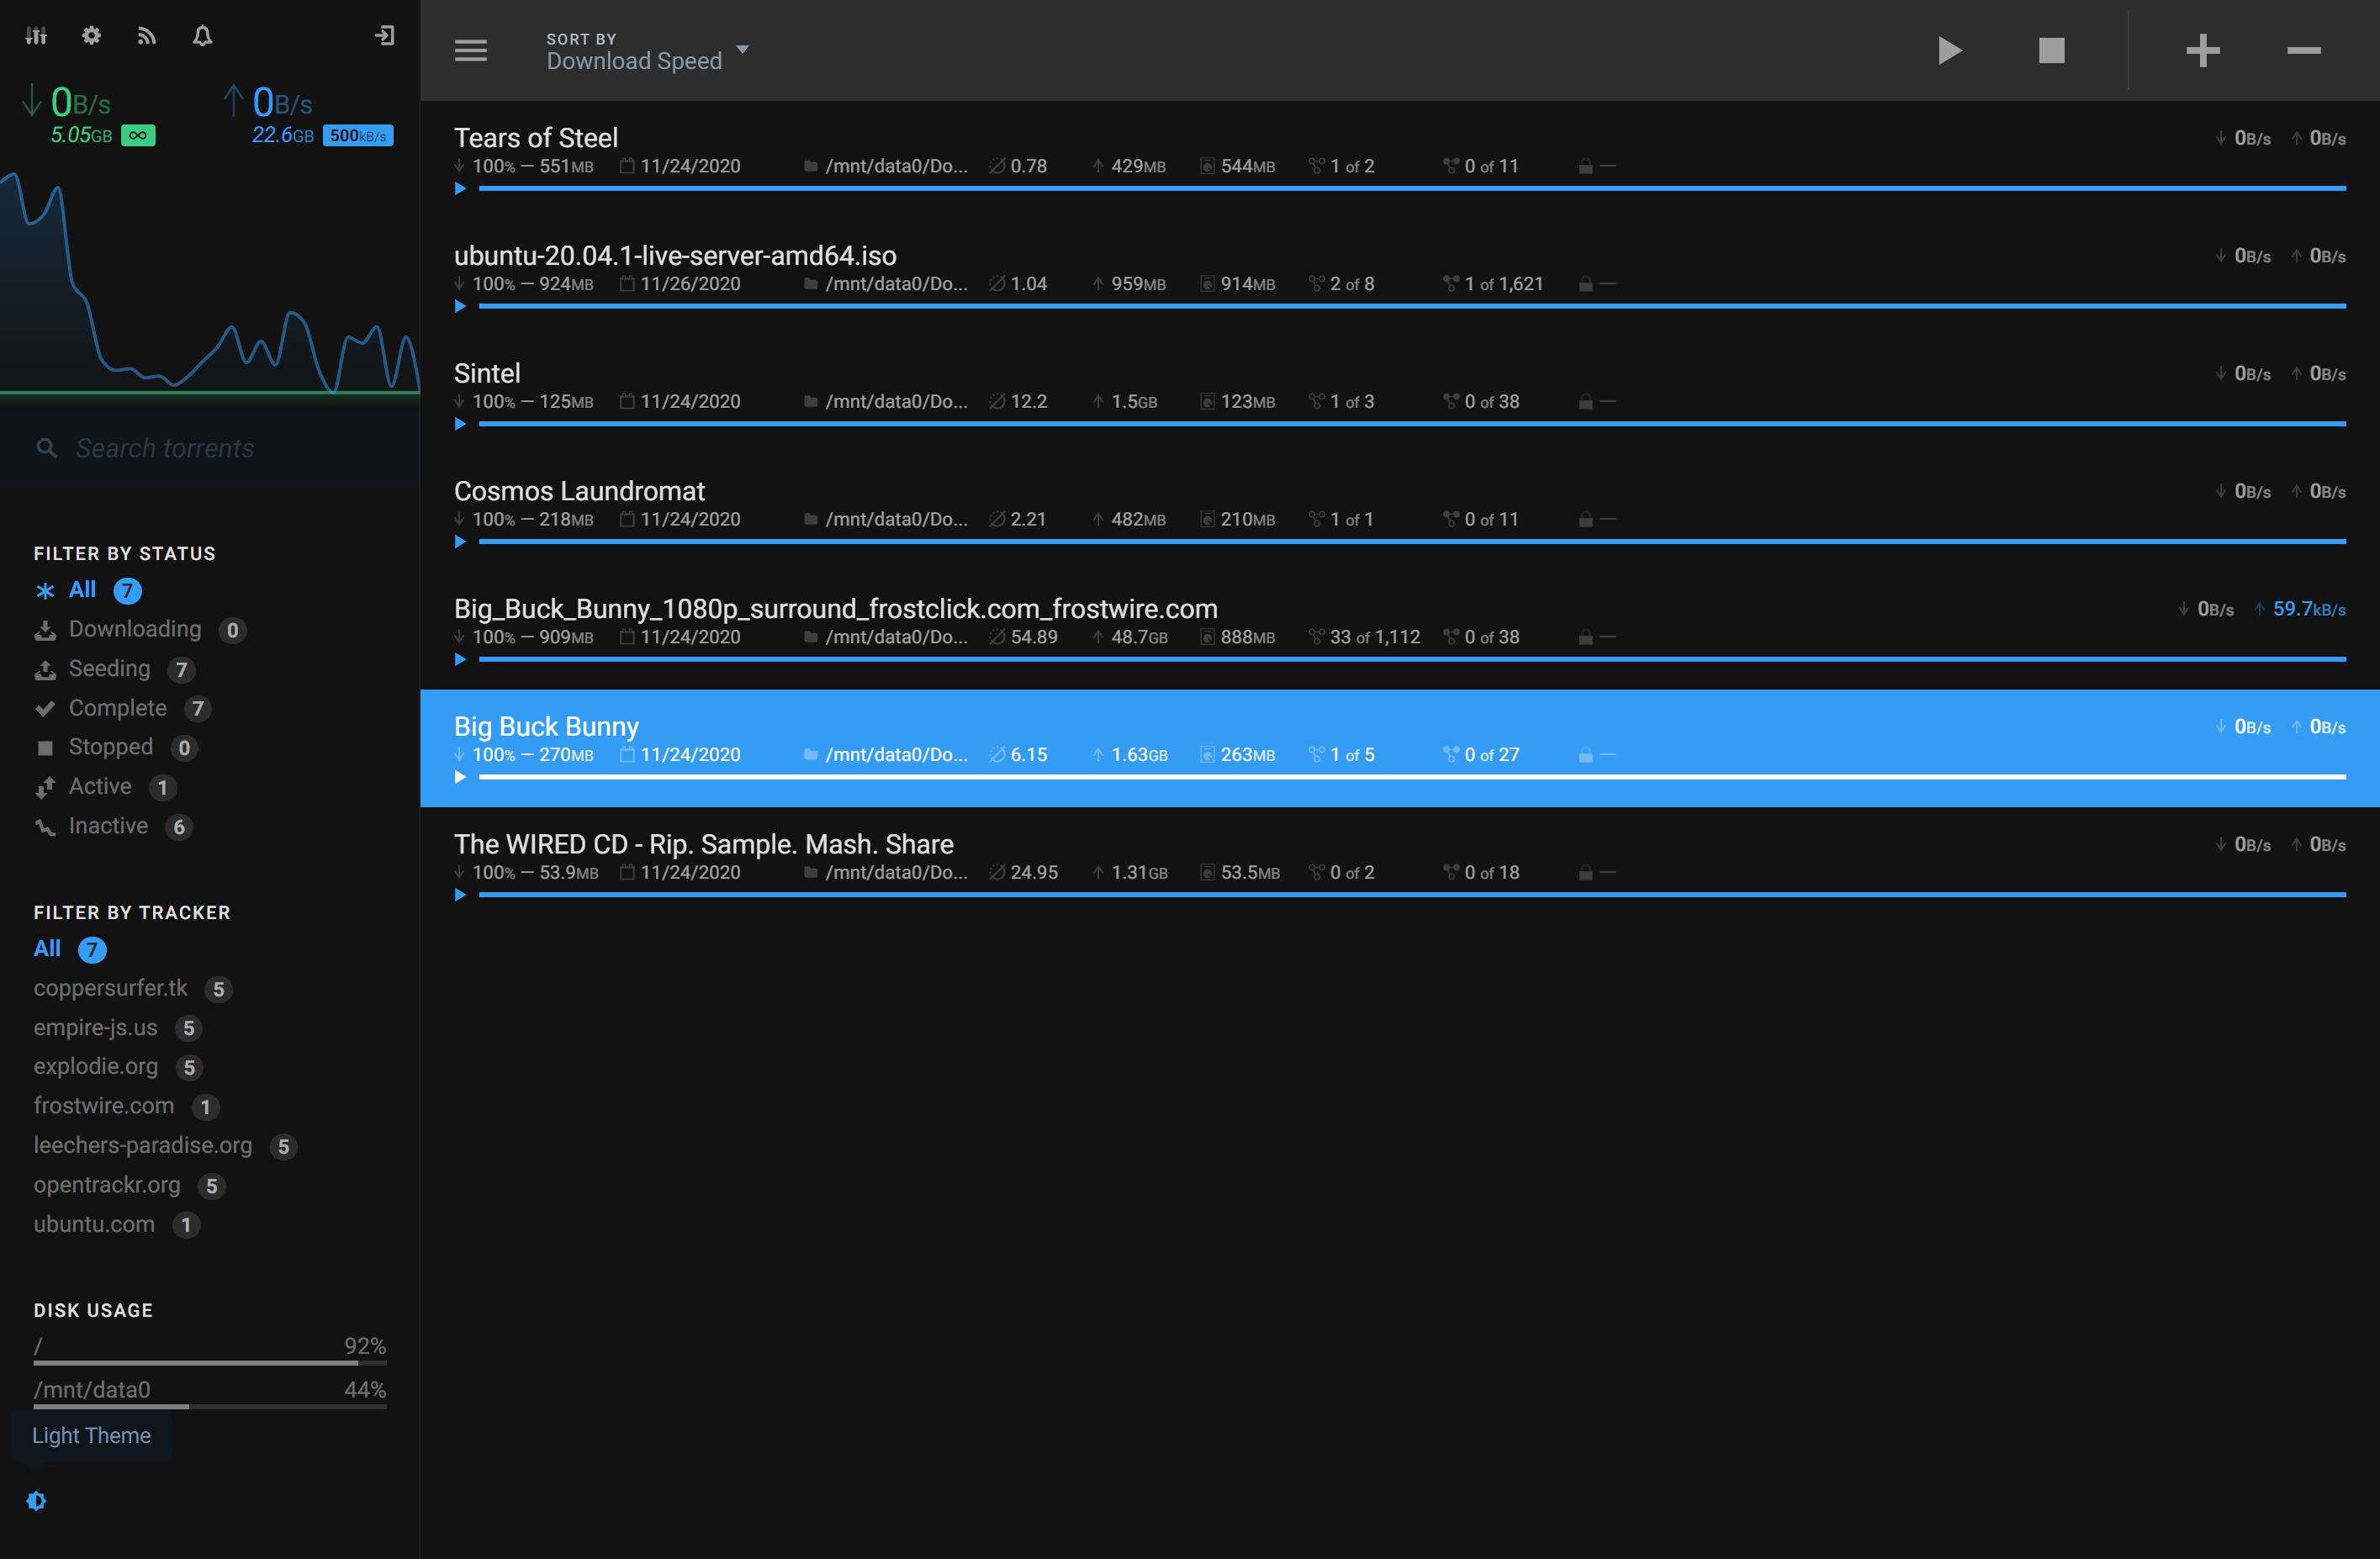 VueTorrent UI는 이렇게 생겼다. 이쁘다!
구성 개요
- 시크릿: NordLynx 개인키(
nord-lynx-private-key)를 담는 Opaque 타입 시크릿. - 서비스(Service):
ClusterIP로 qBittorrent 웹 및 토렌트 포트 노출. - 디플로이먼트(Deployment):
- 사이드카 컨테이너
ghcr.io/bubuntux/nordlynx:latest (VPN) - 메인 컨테이너
lscr.io/linuxserver/qbittorrent:latest initContainer로 커널 파라미터 설정(sysctl)NET_ADMIN capability 부여(터널 동작용)fsGroup: 1000으로 퍼미션 정리
- Ingress(선택): NGINX Ingress
네임스페이스 생성
늘 그렇듯 처음은 Namespace부터 만든다. 이번 포스트에서는 일관성 있게 torrent라는 이름을 사용한다.
1
| kubectl create namespace torrent
|
NordVPN Access Token 발급
- NordVPN Dashboard에 접속 후 좌상단
NordVPN을 클릭한다.
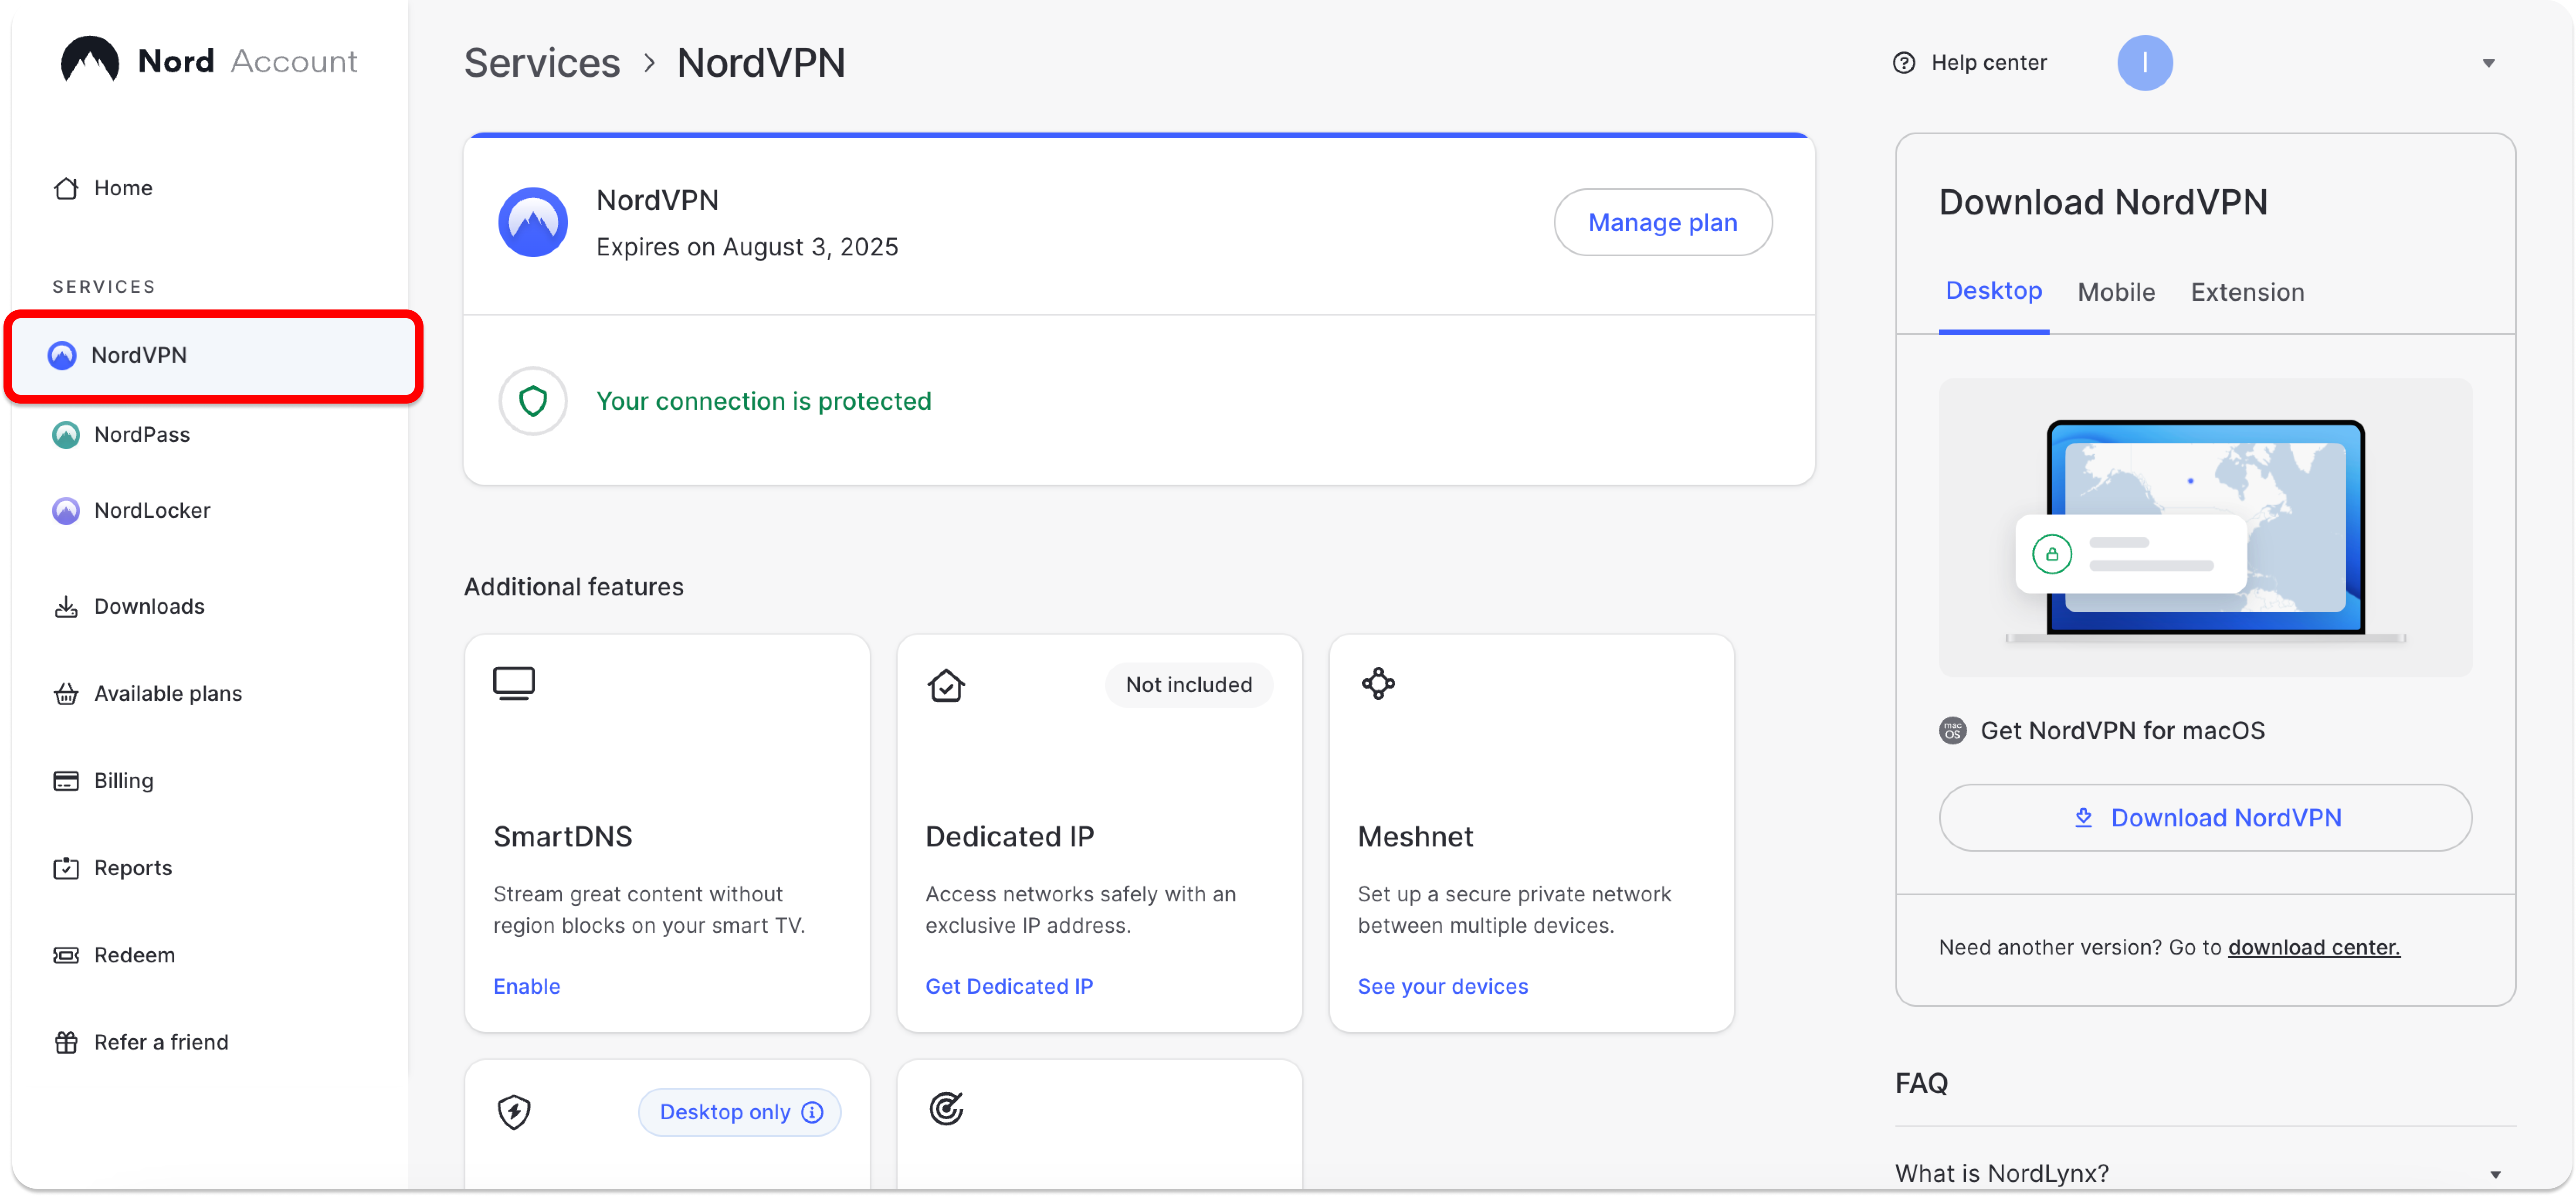
2. 하단에 Get Access Token 버튼 클릭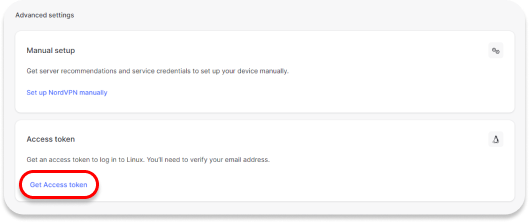
3. 등록된 이메일로 인증코드 전송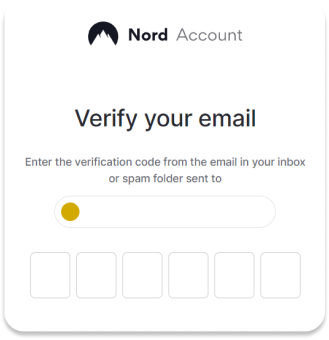
4. 새 토큰을 생성한다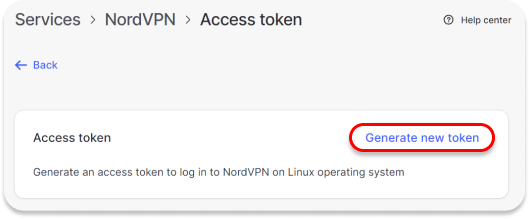
Private Key 생성
Docker 명령어를 통해 Private Key를 생성한다.
<YOUR_ACCESS_TOKEN> 자리에 위에서 생성한 토큰 값을 넣어준다.
1
| docker run --rm --cap-add=NET_ADMIN -e TOKEN=<YOUR_ACCESS_TOKEN> ghcr.io/bubuntux/nordvpn:get_private_key | grep "Private Key:" | cut -d' ' -f3 | tr -d '\n'
|
시크릿 생성
<YOUR_PRIVATE_KEY> 자리를 위에서 Docker Command로 생성한 Private Key 값으로 교체한다.
1
2
| kubectl -n torrent create secret generic torrent-nord-lynx-private-key \
--from-literal=nord-lynx-private-key='<YOUR_PRIVATE_KEY>'
|
Service 생성
service-qbittorrent.yaml:
 1
 2
 3
 4
 5
 6
 7
 8
 9
10
11
12
13
14
15
16
17
18
19
20
21
22
| apiVersion: v1
kind: Service
metadata:
name: qbittorrent
namespace: torrent
spec:
type: ClusterIP
selector:
app: qbittorrent
ports:
- name: web
port: 8080
targetPort: 8080
protocol: TCP
- name: torrenting-tcp
port: 6881
targetPort: 6881
protocol: TCP
- name: torrenting-udp
port: 6881
targetPort: 6881
protocol: UDP
|
적용:
1
| kubectl apply -f service-qbittorrent.yaml
|
PVC 생성
StorageClass가 별도로 없다면 비워도 상관 없다.
가급적 qbittorrent-complete는 HDD에 qbittorrent-incomplete는 SSD에 저장하는 것이 좋다.
pvc-qbittorrent.yaml:
 1
 2
 3
 4
 5
 6
 7
 8
 9
10
11
12
13
14
15
16
17
18
19
20
21
22
23
24
25
26
27
28
29
30
31
32
33
34
35
36
37
38
39
40
41
42
43
| # qBittorrent의 설정을 저장하는 PVC
apiVersion: v1
kind: PersistentVolumeClaim
metadata:
name: qbittorrent-config
namespace: torrent
spec:
accessModes:
- ReadWriteOnce
resources:
requests:
storage: 1Gi
storageClassName: <your-storage-class> # 클러스터 StorageClass 명에 맞게 수정
---
# 다운로드가 완료 된 파일들이 저장될 PVC
apiVersion: v1
kind: PersistentVolumeClaim
metadata:
name: qbittorrent-complete
namespace: torrent
spec:
accessModes:
- ReadWriteOnce
resources:
requests:
storage: 500Gi # 용량은 본인이 원하는 만큼 할당
storageClassName: <your-storage-class>
---
# 아직 다운로드 중인 파일들이 저장될 PVC
apiVersion: v1
kind: PersistentVolumeClaim
metadata:
name: qbittorrent-incomplete
namespace: torrent
spec:
accessModes:
- ReadWriteOnce
resources:
requests:
storage: 200Gi # 용량은 본인이 원하는 만큼 할당
storageClassName: <your-storage-class>
|
적용:
1
| kubectl apply -f pvc-qbittorrent.yaml
|
Deployment 생성
deployment-qbittorrent.yaml:
 1
 2
 3
 4
 5
 6
 7
 8
 9
10
11
12
13
14
15
16
17
18
19
20
21
22
23
24
25
26
27
28
29
30
31
32
33
34
35
36
37
38
39
40
41
42
43
44
45
46
47
48
49
50
51
52
53
54
55
56
57
58
59
60
61
62
63
64
65
66
67
68
69
70
71
72
73
74
75
76
77
78
79
80
81
82
83
84
85
86
87
88
89
90
91
92
93
94
95
96
97
98
99
| apiVersion: apps/v1
kind: Deployment
metadata:
name: qbittorrent
namespace: torrent
spec:
replicas: 1
selector:
matchLabels:
app: qbittorrent
template:
metadata:
labels:
app: qbittorrent
sidecar.istio.io/inject: 'false' # Istio Sidecar와 NordLynx간의 충돌이 있다.
spec:
securityContext:
fsGroup: 1000
initContainers:
- name: init-sysctl
image: busybox
command:
- /bin/sh
- -c
- |
sysctl -w net.ipv6.conf.all.disable_ipv6=1 &&
sysctl -w net.ipv4.conf.all.src_valid_mark=1
securityContext:
privileged: true
containers:
- name: nordlynx
image: ghcr.io/bubuntux/nordlynx:latest
imagePullPolicy: Always
env:
- name: TZ
value: Asia/Seoul
- name: NET_LOCAL
value: '10.244.0.0/16' # 클러스터 Pod CIDR에 맞게 수정
- name: ALLOW_LIST
value: qbittorrent.torrent.svc.cluster.local
- name: DNS
value: '1.1.1.1,8.8.8.8'
- name: PRIVATE_KEY
valueFrom:
secretKeyRef:
name: torrent-nord-lynx-private-key
key: nord-lynx-private-key
- name: QUERY
value: 'filters[servers_groups][identifier]=legacy_p2p'
- name: COUNTRY_CODE
value: JP # 우회를 원하는 국가 코드 기입
securityContext:
capabilities:
add:
- NET_ADMIN
- name: web
image: lscr.io/linuxserver/qbittorrent:latest
imagePullPolicy: Always
ports:
- containerPort: 8080
protocol: TCP
- containerPort: 6881
protocol: TCP
- containerPort: 6881
protocol: UDP
env:
- name: PUID
value: '1000'
- name: PGID
value: '1000'
- name: TZ
value: Asia/Seoul
- name: WEBUI_PORT
value: '8080'
- name: TORRENTING_PORT
value: '6881'
# VueTorrent UI 적용
- name: DOCKER_MODS
value: ghcr.io/gabe565/linuxserver-mod-vuetorrent
volumeMounts:
- name: qbittorrent-config
mountPath: /config
- name: qbittorrent-complete
mountPath: /downloads
- name: qbittorrent-incomplete
mountPath: /downloads/incomplete
volumes:
# qBittorrent 설정 파일
- name: qbittorrent-config
persistentVolumeClaim:
claimName: qbittorrent-config
# 다운로드가 완료된 파일들
- name: qbittorrent-complete
persistentVolumeClaim:
claimName: qbittorrent-complete
# 다운로드 중인 파일들
- name: qbittorrent-incomplete
persistentVolumeClaim:
claimName: qbittorrent-incomplete
|
적용:
1
| kubectl apply -f deployment-qbittorrent.yaml
|
Ingress 생성(선택)
Ingress는 옵션이다. 실 사용에서는 Cloudflare 레코드로 도메인을 연결하고
k8s 내부에는 nginx ingress controller를 설치해서 사용하고 있다.
또한, 인증된 사용자만 접근할 수 있도록 별도로 OAuth2 Proxy로 보호받는다.
여기에 대해서는 추후 포스팅 예정.
ingress-qbittorrent.yaml:
 1
 2
 3
 4
 5
 6
 7
 8
 9
10
11
12
13
14
15
16
17
18
19
20
21
| apiVersion: networking.k8s.io/v1
kind: Ingress
metadata:
name: qbittorrent
namespace: torrent
annotations:
nginx.ingress.kubernetes.io/backend-protocol: 'HTTP'
nginx.ingress.kubernetes.io/rewrite-target: '/'
spec:
ingressClassName: nginx
rules:
- host: torrent.your-domain.com # 실제로 연결할 도메인 선택
http:
paths:
- path: /
pathType: Prefix
backend:
service:
name: qbittorrent
port:
number: 8080
|
적용:
1
| kubectl apply -f ingress-qbittorrent.yaml
|
참고
NET_LOCAL은 클러스터 Pod CIDR에 맞춘다.
PRIVATE_KEY는 위 시크릿 참조와 일치시킨다.
initContainer는 커널 파라미터를 조정하므로 privileged가 필요하다.
NET_ADMIN capability가 없으면 VPN 터널이 정상 동작하지 않는다.
VPN 네트워크가 끊어지면 모든 토렌트 서비스가 셧다운 된다.
Service Type은 Cluster IP로 설정했는데, 이는 Nginx Ingress Controller와 연결하기 위함이다.
환경에 따라 NodePort나 LoadBalancer를 사용해서 접근 할 수 있도록 하자.
마치며
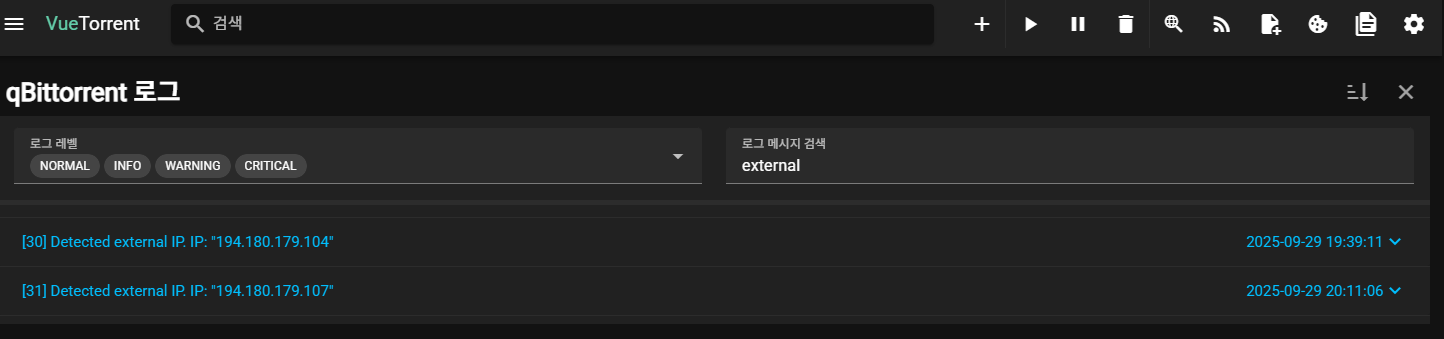 WebUI에서 로그를 검색해보면 정상적으로 VPN IP가 할당되었음을 알 수 있다.
 최종적으론 이렇게 나온다